 AWS
AWS
How to host GoDaddy domain with AWS EC2
Many newbies find AWS and domain providers such as GoDaddy confusing to connect. But it is not a difficult task and you can host GoDaddy domain with AWS EC2 instantly.
To connect AWS with the domain we will have to use a service called Route53 (53 refers thee TCP/UDP port 53 for DNS serving). And also there won’t be any direct way to do without this service. You can use any AWS public gateway provider such as EC2, ELB, S3 to serve your website or server to the public domain you have on GoDaddy. The AWS usually charges about .51 USD per month to maintain this zone entry as well.
We are discussing the following points step by step to set up your domain.
- Obtain the Elastic IP or EC2 IP for the website or service.
- Create a Hosted Zone on Route53.
- Update the domain name records on Hosted Zone.
- Update name servers on GoDaddy for discovery.
Obtain the IP for your service
After uploading the website or running the service in EC2, we will need a public IP to expose the container. There are many ways we can configure this. But for this example, I will directly get the pubic IP of the container that you have hosted.
Go to the EC2 instances and select the container which has the website or the service.
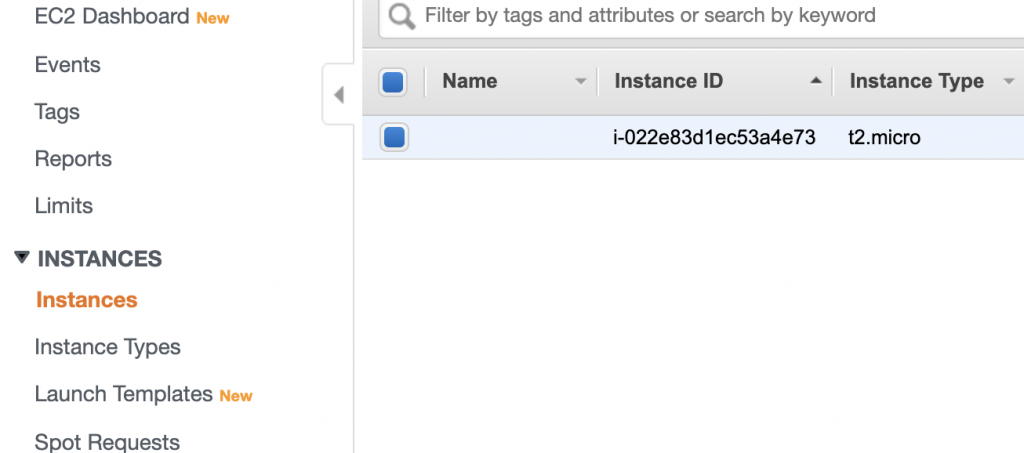
After that, copy the IPv4 Public IP which should display the content of the website. This will be the content directly displayed from the domain that you are going to enter.
First, check whether the IP address is serving the content that you wish to display from the your domain. If its a website, you can directly enter the domain on the web address of a Browser. If its a service you can change the host for the IP address and invoke the service,

Create a Hosted Zone on Route53
A hosted zone is merely a name created by AWS which is quite same as the DNS zone file. It contains the records needed to manage the domain and subdomain along with different record types.
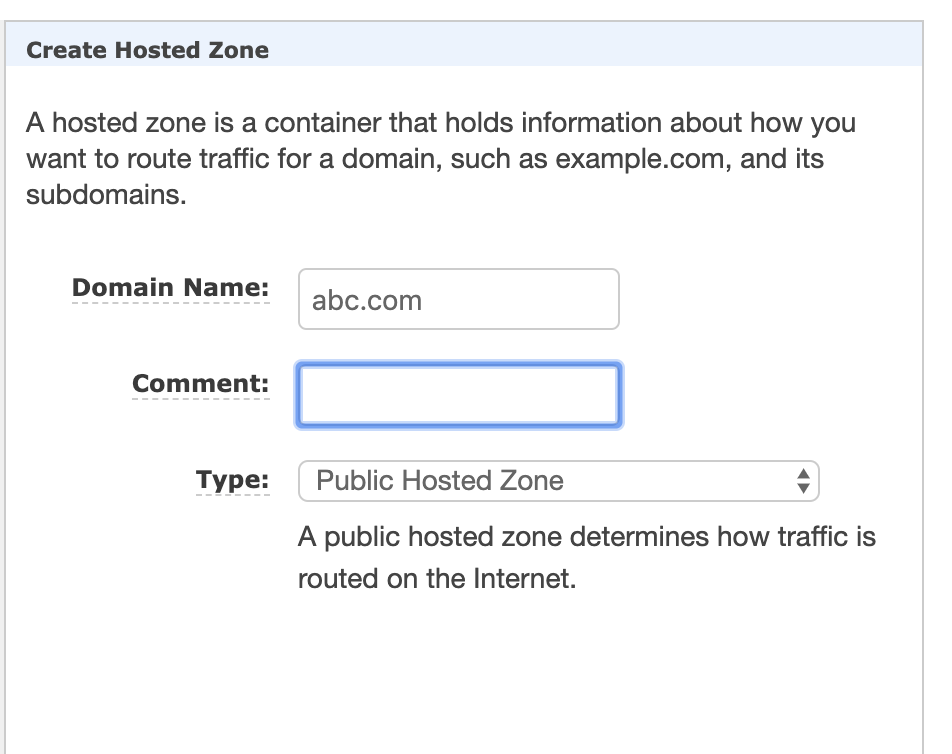
First, go to the Route53 from services and select Create Hosted Zone.


After that, enter your domain name, without www or http or any other tags as the parent domain for the hosted zone and create the zone. Make sure to select Public Hosted Zone as the type of zone.
After creating the zone, you may see two entries. These entries are needed later to update the nameservers of the GoDaddy DNS.
Update domain name records on Hosted Zone
Click on Create Record Set button to enter the IP to the hosted zone.
- Select the Type to A record
- Keep the name blank
- Keep alias No
- Add the value to the public IP you copied from the EC2.
- Keep routing policy Simple Routing.
Create the record after entering the details properly.
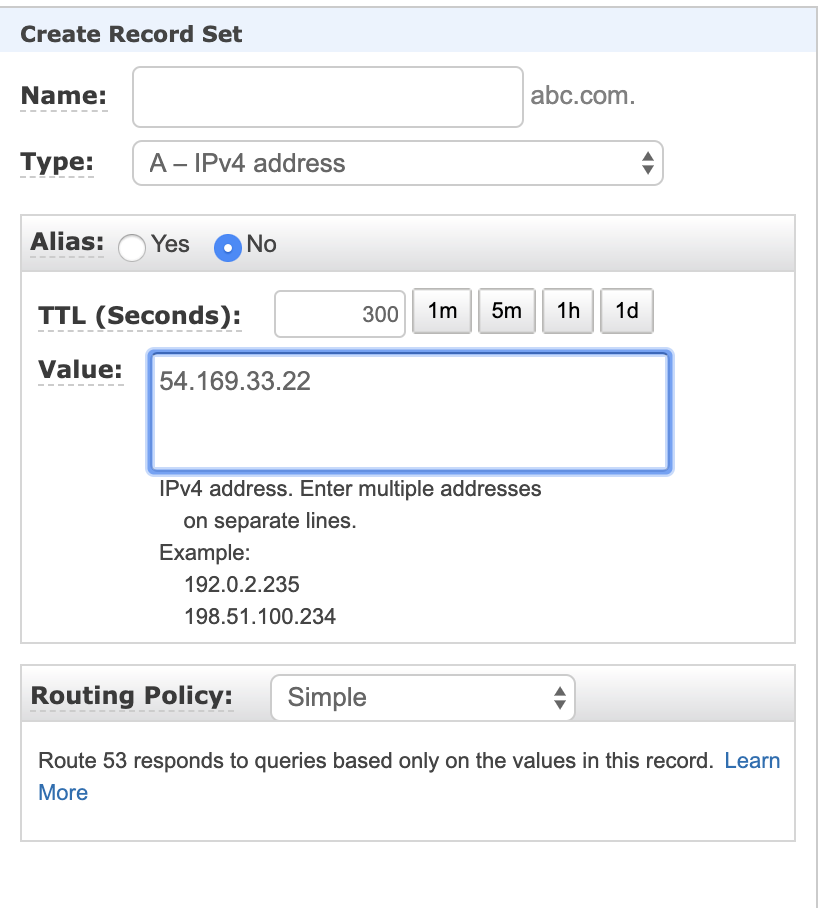
We need to create the www.abc.com subdomain entries also to work.
- Add www to the Name.
- Select Yes for Alias
- Enter the domain you had entered as the domain for Alias Target
- Select Routing Policy as Simple.
Create the record and www.yourdomain.com should also redirect.
Update name servers on GoDaddy for discovery to host GoDaddy domain with AWS EC2
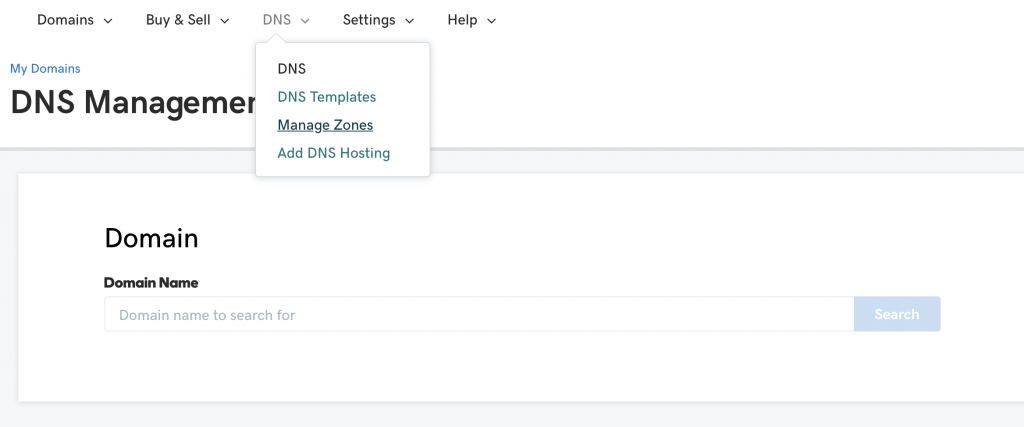
Select Manage Zones from the DNS dropdown and select your domain after searching.
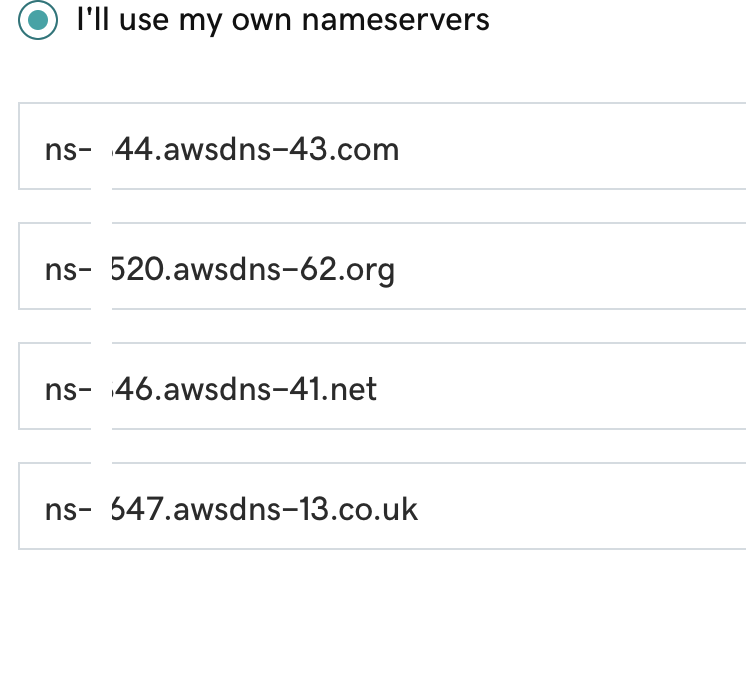
Select change nameservers from the Nameservers. This will contain two default nameservers. You can remove them and enter the new ones.
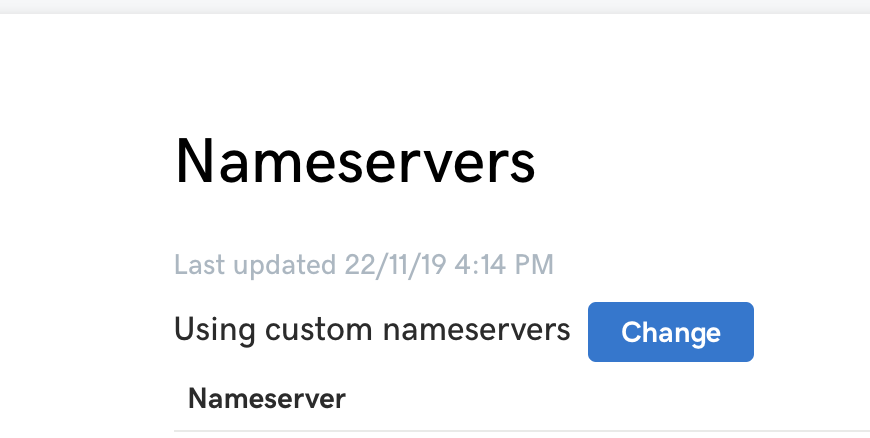
Enter the NS records from the hosted zone you had created previously. Add new rows if necessary since usually, it has four records.

You don’t have to enter the last dot of each Nameserver record when creating the entry.
That’s it! After a while, your EC2 container or the service provided from the IP should be accessible with the domain you had entered.
Also, check out following to get an understanding of NPM and NPX


Pingback: node.js - Register GoDaddy Domain with AWS ec2 instance - Code Utility - Code Utility()
Pingback: Register GoDaddy Domain with AWS ec2 instance()
Pingback: URL()